Saturday 30 June 2012

Scaloppine al limone profumate al timo limone


DSCN0249 - Scaloppine al limone1  


Chi ha tempo non aspetti tempo diceva mio nonno. E aveva ragione. Lui apparteneva ad una generazione che aveva ancora la sensazione di avere tempo libero o essere occupati. Ma io no. 

Io ho sempre la sensazione di non avere tempo, perciò metto da parte tante cose da fare, in ordine di priorità, sperando di arrivare a far tutto prima o poi. E così, questo mese, ho fatto "en plain". Sono riuscita a saltare le dead line sia dell'MTC che di Daring Bakers.

Un mese pieno, questo, con gli impegni che poi tutti abbiamo, niente eventi micidiali, ma lavoro; geriatrico che patisce particolarmente il caldo; veterinario x due quattrozampe - mica in una volta sola, in più appuntamenti separati per ogni bestiola eh,eh; marito in panne con lo studio, che fai prima a studiare tu che a spronarlo, rincuorarlo, e anche strapazzarlo, e che continua a spostare l'esame di volta in volta. Argh!!!!!; un tris di compleanni uno dietro l'altro, per i quali sono riuscita a fare una sola torta, ho impunemente dato priorità alla mia, visto che festeggiavo i miei primi 50 anni con le mie amiche. Il dolce per Daring Bakers aveva succhiato le ultime energie e non poteva ancora essere finito per imprevedibile irreperibilità momentania di ingredienti! Grrr! Quando ormai stremata dal caldo, ho capitolato di fronte all'evidenza che non sarei riuscita a "sfornare" un'altro dolce sciuè sciuè la cena del 28, appunto, per il compleanno-tris ho dovuto accontentarmi di una torta acquistata. E sì che mamma webmaster mi ha fatto anche i complimenti, che la torta era proprio buona, ed avrei potuto a quel punto spacciarla per mia, ed invece ho immediatamente chiarito. No no, l'ho comprata. Sob. :))

E poi c'è stato l'acquisto del parmigiano reggiano, che è vero non sono andata io a ritirare a piedi fino in Emilia, ma comunque un minimo di organizzazione per il mio gruppo c'è voluta. E del reperimento fuori stagione di libri di testo per esami integrativi per blue eyes in arrivo, ne vogliamo parlare? La la creazione a punto peyote della fascia che ho regalato alla nostra colf? Che sbadata, non l'avevo messa in elenco. Ah, sì l'apertura della casa al mare con mocio e secchio in mano, conta anche quella? Quanti punti vinco? 
E la progettazione e inizio di piantagione di un orto quasi-sinergico con i colleghi, quella me la stavo dimenticando. Ed è in aggiunta a quello microcasalingo.
Tornata a casa, stanca ma felice, ho realizzato. Laa cena era fissata per  il 28, - quel 28 del mese, quello che sempre delimita un Challange dall'altro - ed è mezza notte meno un quarto ergo non ho preparato le scaloppine per tempo. Bene! grrr. Non dovrò più chiedere al consorte di comprare della vitella ogni giorno come nell'ultima settimana senza ottenerla. Eh,sì, sono anche stata sabotata da colui che la mattina ci tiene ad andare al mercato per carne e frutta mentre io non posso. E sì che oggi se le è sbafate.
Mentre ammiro immensamente le maghe del mega party sento che sto decisamente perdendo colpi. Tre di ogni portata al momento mi farebbe venire un colpo solo a progettarlo. Ed infatti ho la bloggite "ma anche" il cucinablues.


Nonno, ma tu ce le avevi così tante cose da fare? 

Certo, se leggo in positivo quanto ho elencato, posso dire che per ora ho ancora un lavoro.  La famiglia è in aumento, visto che oltre il nuovo quattrozampe, il bipede è in arrivo fra poco per studiare qui a Roma. Se il geriatrico patisce l'afa , vuol dire che ancora c'è,  vado verso i prossimi 50 anni, ho una mammawebmaster con cui vado d'accordo, ci vogliamo bene e ci stimiamo. Ancora una torta ogni tanto nell'afa più totale riesco a "sfornarla" e soprattutto so con chi dividerla.


DSCN0242 - Scaloppine al limone2


Inutile dire che ho eseguito pedissequamente la ricetta di Elisa, perchè  anche io ho scoperto di non aver mai veramente cucinato una scaloppina da manuale. Mi è sempre mancata l'aggiunta del fondo di cucina. Ora sì che ho ottenuto un bel sughetto di quantità giuste per accompagnare la carne. E anche questa volta ribadisco che la mia esperienza di blogger  e di condomina CI è nel segno del continuo imparare  sia dagli altri che dai libri, ma che senza gli altri, il confronto con gli altri, si impara sempre di meno. E quindi, a parte la fretta, ho voluto iniziare proprio con l'original, la base delle basi. E visto quanto ho detto prima, credo che il webmaster non si "dimenticherà"  più la carne per le scalopine. Eh,eh.
Ah, dimenticavo, il timo limone è sempre sul mio balcone ;) Mica sono una Rosemarie senza Thyme


SCALOPPINE DI VITELLO AL LIMONE PROFUMATE AL TIMO LIMONE


Uno degli aspetti caratterizzanti di questa preparazione, insieme alla pezzatura della carne, è senz'altro il fondo di cottura, che bisogna curare e coccolare, per ottenere una scaloppina con una salsa degna di nota, perché i fondi e le salse in cucina sono di fondamentale importanza e il risultato finale di molte ricette dipende spesso dalla loro qualità. Ma cosa significa coccolare? Semplicemente che dopo aver infarinato e rosolato la carne, bisogna metterla da parte e dedicarsi alla salsa, come potrete leggere nella ricetta qui sotto.
Prima di cominciare, solo due parole per spiegare alcuni termini che userò: quando parlerò di fondo di cottura mi riferirò a ciò che rimane dopo la cottura di una vivanda; per fondo di cucina invece si intendono tutte quelle preparazioni di base che servono per impostare le lavorazioni (fondi bruni e bianchi, fumetto di pesce, glace, brodi, consommé, gelatine, roux, court-bouilllon, marinate, salamoie, ecc.), nel caso specifico delle scaloppine i fondi di cucina che ci interessano sono perlopiù i brodi vegetali, di carne e di pesce. Infine con la parola deglassare, si indica il procedimento attraverso cui si bagna con vino o un altro liquido per far fondere il succo lasciato da una vivanda.


Ingredienti per due persone

2 fette di vitella  da 100 g l'una
burro q.b. (l'ideale sarebbe il burro chiarificato, ma non è necessario)
3-4 cucchiai di farina
1 limone non trattato (il succo e la scorza)
2 zucchine chiare
1 spicchio d'aglio
qualche rametto di timo limone
olio evo q.b.
sale q.b.
pepe nero q.b.
1 dl di brodo di pollo

Procedimento
Mondare e lavare le zucchine, tagliarle a listarelle e rosolarle in padella con uno spicchio d'aglio in camicia, un filo d'olio evo e qualche rametto di timo limone. Aggiustare di sale e tenere da parte.
Battere le fette di pollo: è importante che siano sottili, quindi se non avete un batticarne, chiedete al macellaio di farlo per voi. Esiste un piccolo accorgimento per battere la carne senza sfibrarla: basta semplicemente adagiare la fettina tra due fogli di pellicola ed impugnare molto bene il batticarne (alla base) per dare colpi dritti e decisi.
Tagliare le fette di pollo a metà: solitamente si contano due scaloppine a testa, ognuna da 40-50 g. Mescolare la farina con la scorza di limone grattugiata e, con questo composto, infarinare la carne; in una padella (possibilmente non anti-aderente) far scaldare un pezzo di burro e rosolare le scaloppine a fuoco vivace da entrambi i lati. Salare solo dopo la rosolatura, perché il sale tende a disidratare la carne e si rischia di ottenere fettine asciutte e dure: se si attende invece che i pori della carne siano ben sigillati grazie al calore, i succhi rimarrano in gran parte all'interno (o meglio, verranno rilasciati solo quelli necessari a creare il fondo di cottura). Insaporire le scaloppine con un pizzico di pepe e sistemarle su un piatto da tenere da parte.
A questo punto dedicarsi alla salsa: deglassare il fondo di cottura con il succo di limone, lasciare evaporare leggermente e unire il fondo di cucina (in questo caso brodo di pollo); far bollire per qualche minuto, in modo da restringere la salsa, dopodiché aggiungere una noce di burro e ruotare la padella per emulsionare. Filtrare la salsa con un colino e versarla sulle scaloppine, che avremo rimesso in padella a insaporire insieme al contorno. Eventualmente si può tenere un po' di salsa da parte per poi versarla direttamente nel piatto al momento di servire.
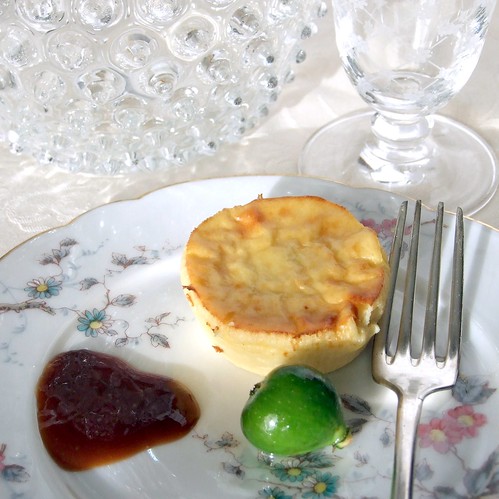
p.s. quella che vedete nel bicchierino della seconda foto è proprio la salsa tenuta da parte: tanto per darvi l'idea di come dovrebbe risultare ;) 


Con questo post partecipo fuori concorso all'MTC di giugno

Wednesday 27 June 2012

Battenberg Cake for Daring Bakers on a special date

Daring Bakers' Challange reveal date is on  my birthday .

DSCN0300_battenberg cake_slice
traditional Battenberg cake


Battenberg cake collage


I was really intrigued by the Battenberg Cake. Another new recipe for me and a bit of royal family history to read about. First of all I discovered that the Battenbergs are none other than the side of the family we now know as Mountbatten.

It is said that the cake was made for the marriage of one of Queen Victoria's grandchildren Princess Victoria of Hesse and by Rhine to her father's first cousin, Prince Louis of Battenberg, an officer in the United Kingdom's Royal Navy.


Victoria of Hesse and by Rhine,  was the daughter of  Princess Alice of the United Kingdom of Great Britain and Ireland herself one of the daughters of Queen Victoria and Prince Albert.


even more beautiful in her old age

I kept asking myself what the original wedding cake must have looked like. I am still wondering if it was a four squares affair or something larger, seeing it was a wedding cake. Somewhere I read it was probably made of nine squares.

But there is some also some interesting evidence against the Wedding Cake theory that you can read :


DSCN0295_2Battenberg cake


TRADITIONAL BATTENBERG: Servings: +- 8
Daring Bakers recipe from Mandy

Ingredients

 ¾ cup (1½ sticks) 175 g / 6 oz Unsalted Butter, softened & cut in cubes
¾ cup / 175 g / 6 oz Caster Sugar 
1¼ cups / 175 g / 6 oz Self-Raising Flour (***see end of doc on how to make your own)
3 Large Eggs, room temp
½ cup / 65 g/ 2 1/3 oz Ground Almonds (Can be substituted with ground rice)
3/4 tsp / 3½ g Baking Powder
½ tsp / 2½ ml Vanilla Extract 
1/4 tsp (1¼ ml) Almond Extract
Red Food Colouring, paste, liquid or gel To Finish
1/3 cup (80 ml) 100 g /3 ½ oz Apricot Jam
1 cup / 225g / 8 oz Marzipan, natural or yellow

The Marzipan Recipe I used

200 g of almond flour
100 g of plain icing sugar
100 g of vanilla flavoured icing sugar
30 g of flour
2 egg whites

Combine dry ingredients (no exessive blending - it would heat the almond flour and that is no good) in a food processor then add the egg whites. Do not overwork the marzipan. Place in a sealed container in the refrigerator for a few hours. If you make it one day for the next it is even better.


Of the Battemberg cakes made differently from the original recipe, I really liked this one make by Korena of Korena in the Kitchen. I just have to show you how beautiful it is, then you will certainly visit her blog for the recipe.


And here are the original notes given by By this month's host Mandy

Hello Daring Bakers! It’s Mandy of What the Fruitcake?! and I am so excited about this month’s challenge. It’s not over- complicated, uses simple ingredients, doesn’t take an age to do, but, I think it’s a classic that has a certain whimsical quality, and something that I think we’ll be able to have a lot of fun with. There’s definitely room for creativity here! What are we doing? Battenberg Cake! Funny enough, before making this cake for the challenge, I hadn’t eaten a single crumb of a Battenberg. But whenever one caught my eye in the store, I couldn't help but look at it with a smile. There’s something about the checkered squares in yellow and pink that makes me think of tea with Alice at the Madhatter’s, or a little girl serving out slices to her teddy bears on little plastic plates. This cake has far grander beginnings than tea with teddy. It was actually created as a wedding cake for royalty. The first Battenberg cake was made to celebrate the marriage of Queen Victoria’s granddaughter, Princess Victoria, to husband Prince Louis of Battenberg. It’s traditionally flavoured with almond and has the signature Battenberg markings, that is, the yellow and pink squares (said to represent the four princes of Battenberg). The strips of sponge are glued together using jam (normally apricot) and the whole cake is covered in marzipan. Sometimes the edges are crimped and the top is patterned with a knife. Being that this recipe is thoroughly English, I thought it would be appropriate to use a recipe from a fantastic English baker, Mary Berry. (Don’t you just love her name?). This traditional Battenberg recipe comes from Mary Berry’s “Baking Bible”. It’s an all in one cake method, so very simple, quick and very few dirty dishes! Although there are specialised Battenberg cake tins available, you don’t need one. This can be baked in a square baking tin and a divide made with foil to separate the two batters. This recipe really is all about simplicity. Your challenge, fantastic DBers, is to make a Battenberg cake. It must be in the traditional shape (square oblong) and must have at least two different coloured checks as well as be covered in a firm edible covering like marzipan. But, you can choose any flavours you like, and if you want, even do more than two colours (look at the end of this post for a link to a fun Rubiks Cube Battenberg).

I would encourage you to use marzipan, but I know many people don’t like marzipan at all, so you can also use rolled fondant or chocolate plastique to cover your cake. You can also use buttercreams, curd, ganache etc instead of jam to glue the cake together. I’ve also included another of Mary Berry’s Battenberg recipes, a coffee and walnut Battenberg, held together with coffee buttercream. Other popular flavours are lemon and orange sponges glued with lemon curd and also coconut sponge with raspberry jam. I hope your creative ideas get flowing 'cause the flavour sky is the limit, go wild! Something I love about this treat is that it makes quite a small cake, but that’s a good thing! It means you could make two or three, which means you can play with more flavours! One last thing before the nitty gritty, here’s a fantastic video with Mary Berry herself from an episode of The Great British Bake Off demonstrating her walnut and coffee Battenberg. It shows the assembly really well so is worth watching. Battenberg up! 

Recipe Source:

Traditional Battenberg adapted from Mary Berry’s “Baking Bible”
Coffee and Walnut Battenberg is also from Mary Berry on the BBC Food website

Blog-checking lines: Mandy of What The Fruitcake?! came to our rescue last minute to present us with the Battenberg Cake challenge! She highlighted Mary Berry’s techniques and recipes to allow us to create this unique little cake with ease. Posting Date: June 27, 2012


A few tips when working with marzipan/fondant/chocolate plastique in humid and hot weather. Firstly, keep it cool. It does need to be pliable, but it won't hurt to chill it just slightly to help keep your covering from "melting" and becoming too sticky to work with. You do need to knead it to get it ready for rolling and covering but try to handle it as little as possible as soon as it's pliable enough, and if you need to, roll out the marzipan in between sheets of parchment paper and use plenty of corn flour or powdered sugar on your rolling pin, hands, surface etc.

 I've adapted Mary Berry's recipes quite a bit in terms of quantities 'cause I found the amount of batter to be too little for an 8"x8" (20cmx20cm) cake pan, once the sponges were trimmed the strips were a bit on the slim side. The amounts provided are perfect for an 8"x8" (20cmx20cm) tin. However, if you do have a Battenberg pan (8"x6") (20cmx15cm) then you will have some leftover batter. Just fill your Battenberg tin to 3/4 full and that should be enough for the batter to rise above the top of the pan which you can then trim off. The batter is your basic sponge recipe, equal amounts of butter, sugar and flour (in weight) and it's not a fussy recipe at all. Although a lot of Battenberg recipes first cream the butter and sugar, Mary Berry swears she gets a better Battenberg sponge by using the all in one method, and I must say, my sponges came out great using the all in one method. But you're welcome to use the creaming method if you like. And if you do use the all in one method, just make sure you don't over mix the batter, once it's all combined, it's done (hard for a chronic over mixer like me!). I didn't even bother using my stand mixer, I used my hand electric mixer, and I think you could quite easily even use a wooden spoon for some old school baking If you want to add a flavour to one of the sponges in liquid form, make sure to add the same amount of liquid to the other batter in the form of milk. The batter is very thick and should be quite thick so don't add too much. You'll see an example of this in the Coffee & Walnut Battenberg. I've included links at the end of the post for home made marzipan as well as recipes for chocolate plastique/modelling chocolate. Also at the end of the post is how to make your own self raising flour. And for those who want to substitute the ground almonds in the batter for something else, Mary Berry recommends substituting with ground rice. It needs to be a similar texture to ground almonds so don't use rice flour. You can make your own ground rice in a food processor or coffee grinder.

Mandatory Items:
- You must make your Battenberg in the traditional square & oblong shape
- You must have at least two different coloured sponges
- You must have the traditional Battenberg Markings, ie a checked pattern
- Your Battenberg must be covered in a firm edible covering ie. Marzipan, fondant or chocolate plastique 

Variations allowed:
- You can use any flavours you like
- You can have more than two coloured sponges
- You can have more than four squares making up the Battenberg markings (the checked pattern)
- You can colour the covering (marzipan, fondant or chocolate plastique)
- You can use ganache, frosting, curds etc as the "glue" for the sponges instead of jam Preparation time: 

Preparation: 15-20mins Baking & Cooling Time: 45-60mins

Assembly: 15-20mins

Equipment required:
Medium Large Mixing Bowl
Medium Small Bowl (for buttercream)
Small Heatproof Bowl (for jam)
Spatula/Spoonula
 Wooden Spoon OR Electric Handmixer OR Stand Mixer
 Large Sieve Small Sieve (for jam)
 Pastry Brush (for jam)
Small Palette Knife OR Spatula OR Blunt Knife (for buttercreams etc)
 8"x8" (20cmx20cm) Square Baking Tin OR 8"x6" (20cmx15cm) Battenberg Tin
 Bread Knife OR Pastry Knife
 Rolling Pin
 Sharp Knife
 Whisk

Traditional Battenberg: Servings: +- 8

Ingredients

 ¾ cup (1½ sticks) 175 g / 6 oz Unsalted Butter, softened & cut in cubes
¾ cup / 175 g / 6 oz Caster Sugar 
1¼ cups / 175 g / 6 oz Self-Raising Flour (***see end of doc on how to make your own)
3 Large Eggs, room temp
½ cup / 65 g/ 2 1/3 oz Ground Almonds (Can be substituted with ground rice)
3/4 tsp / 3½ g Baking Powder
½ tsp / 2½ ml Vanilla Extract 
1/4 tsp (1¼ ml) Almond Extract
Red Food Colouring, paste, liquid or gel To Finish
1/3 cup (80 ml) 100 g /3 ½ oz Apricot Jam
1 cup / 225 g / 8 oz Marzipan, natural or yellow

Directions:
 1. Preheat oven to moderate 350°F/180°C/160°C Fan Assisted/Gas Mark 4
 2. Grease an 8”/20cm square baking tin with butter
 3. Line the tin with parchment paper, creating a divide in the middle with the parchment (or foil) - Tip: See photos or watch video above for detailed instructions
 4. OR Prepare Battenberg tin by brushing the tin with melted butter and flouring
 5. Whisk together the dry ingredients then combine with the wet ingredients in a large bowl and beat together just until the ingredients are combined and the batter is smooth
 6. Spoon half the mixture into the one side of the prepared baking tin
 7. Add a few drops of red food liquid/gel/paste to the remaining batter, stir until the colour is thoroughly distributed, add more colour if needed
 8. Spoon the pink batter into the other half of the prepared baking tin
 9. Smooth the surface of the batter with a spatula, making sure batter is in each corner
 10. Bake for 25-30mins until the cake is well risen, springs back when lightly touched and a toothpick comes out clean (it should shrink away from the sides of the pan)
11. Leave to cool in the tin for a few minutes before turning out to cool thoroughly on a wire rack
12. Once completely cool, trim the edges of the cake with a long serrated knife
13. Cut each coloured sponge in half lengthways so that you are left with four long strips of sponge
14. Neaten the strips and trim as necessary so that your checkered pattern is as neat and even as possible 15. Gently heat the apricot jam and pass through a small sieve yellow next to one pink. On top of that, one pink next to one yellow) - Tip: See photos for detailed instructions

16. Brush warmed jam onto the strips of cake to stick the cake together in a checkered pattern (one yellow next to one pink. On top of that, one pink next to one yellow) - Tip: See photos for detailed instructions

17. Dust a large flat surface with icing sugar then roll the marzipan in an oblong shape that is wide enough to cover the length of the cake and long enough to completely wrap the cake
18. Brush the top of the cake with apricot jam
19. Place the cake on the marzipan, jam side down - Tip: Either in the middle or to the one side of the marzipan
 20. Brush the remaining three sides with jam
 21. Press the marzipan around the cake, making sure the join is either neatly in the one corner, or will be underneath the cake once turned over - Tip: If you put the sponge to the one side of the marzipan, I found it easiest to "roll" the sponge over and over onto the marzipan instead of lifting the marzipan up onto the sponge 22. Carefully flip the cake over so that the seam is under the cake and score the top of the cake with a knife, you can also crimp the top corners with your fingers to decorate
23. Neaten the ends of the cake and remove excess marzipan by trimming off a small bit of cake on both ends to reveal the pattern.


Coffee and Walnut Battenberg: Servings: +- 8

Ingredients

¾ cup (1½ sticks) 175gm / 6 oz Unsalted Butter, softened & cut in cubes
¾ cup / 175 g/ 6 oz Caster Sugar
1¼ cups / 175 g / 6 oz Self-Raising Flour (***see end of doc on how to make your own)
3 Large Eggs, room temp
½ cup / 65 gm / 2 1/3 oz Ground Almonds (Can be substituted with ground rice)
3/4 tsp / 3½ gm Baking Powder
3 tsp (15 ml) Milk
½ tsp (2½ ml) Vanilla Extract
1½ tsp (7½ ml) 7 gm Instant Coffee Powder or Granules
3 Tbsp / 25gm / 1 oz Walnuts, roughly chopped 

To Finish
½ cup (1 stick) 115gm /4 oz Unsalted Butter 
2 cups / 225gm /8 oz Powdered (Icing/Confectioners') Sugar
½ tsp / 2 gm Instant Coffee
1½ tsp (7½ ml) Milk or Cream 
1 cup / 225 gm /8 oz Marzipan, natural or yellow 

Directions:
1. Preheat oven to moderate 350°F/180°C/160°C Fan Assisted/Gas Mark 4
2. Grease an 8”/20cm square baking tin with butter
3. Line the tin with parchment paper, creating a divide in the middle with the parchment (or foil) - Tip: See photos or watch video above for detailed instructions
 4. OR Prepare Battenberg tin by brushing the tin with melted butter and flouring
5. Whisk together dry ingredients (except walnuts and coffee) and combine with the wet ingredients in a large bowl (except vanilla and milk) and beat together just until the ingredients are combined and the batter is smooth
6. Spoon half the mixture into a separate bowl and stir in the vanilla, 1½ teaspoons milk and chopped walnuts
7. Spoon the walnut mixture into the one side of the prepared baking tin
8. Dissolve the coffee in the remaining 1½ teaspoon milk and add to the remaining batter, stir until just combined
9. Spoon the coffee batter into the other half of the prepared baking tin
10. Smooth the surface of the batter with a spatula, making sure batter is in each corner
11. Bake for 25-30mins until the cake is well risen, springs back when lightly touched and a toothpick comes out clean (it should shrink away from the sides of the pan)
12. Leave to cool in the tin for a few minutes before turning out to cool thoroughly on a wire rack The specialised Battenberg cake tin. Because it's such a thick batter I find that if you spread the batter so that it's higher at the edges, when it bakes it helps rise without as much of a curved surface. 13. Once completely cool, trim the edges of the cake with a long serrated knife 14. Cut each sponge in half lengthways so that you are left with four long strips of sponge 
15. Neaten the strips and trim as necessary so that your checkered pattern is as neat and even as possible 16. Combine the buttercream ingredients together and mix until combined
17. Spread a thin layer of buttercream onto the strips of cake to stick the cake together in a checkered pattern (one yellow next to one pink. On top of that, one pink next to one yellow) - Tip: See photos for detailed instructions 
18. Dust a large flat surface with icing sugar then roll the marzipan in an oblong shape that is wide enough to cover the length of the cake and long enough to completely wrap the cake 
19. Spread the top of the cake with a thin layer of buttercream 
20. Place the cake on the marzipan, buttercream side down 
21. Spread buttercream onto the remaining three sides 
22. Press the marzipan around the cake, making sure the join is either neatly in the one corner, or will be underneath the cake once turned over 
23. Carefully flip the cake over so that the seam is under the cake and score the top of the cake with a knife, you can also crimp the top corners with your fingers to decorate 
24. Neaten the ends of the cake and remove excess marzipan by trimming off a small bit of cake on both ends to reveal the pattern

 Chocolate Plastique / Modelling Chocolate: Servings: +- 8

 Dark Chocolate Plastique
 200gm /7 oz Good Quality Dark Chocolate (70% Cocoa content)
 ¼ cup / 60ml /2 oz Light Corn Syrup / Glucose Syrup / Golden Syrup

Milk Chocolate Plastique
200gm /7 oz Good Quality Milk Chocolate (+-50% Cocoa content)
3 Tbsp / 45ml /1½ oz Light Corn Syrup / Glucose Syrup / Golden Syrup

White Chocolate Plastique
200gm /7 oz Good Quality White Chocolate
2 Tbsp / 30ml /1 oz Light Corn Syrup / Glucose Syrup / Golden Syrup 

 Directions: 
1. Melt the chocolate in a double boiler or in a heatproof bowl over a pot of simmering water, stir occasionally 
2. Once completely melted, remove from heat and allow to cool a bit
3. Stir in corn syrup / glucose syrup / golden syrup, it will seize up almost immediately, just keep stirring until mixed and it comes away from the side of the bowl
4. Transfer chocolate into a sealable bag, spread the chocolate out then seal the bag
5. Leave overnight or refrigerate for about 2 hours until completely firm
6. Turn out from the bag and knead on a surface dusted with powdered sugar, at first it will just break , but as you knead, it will warm up and start to become pliable
7. Knead until it's pliable enough to roll out or mould, 5 - 10mins . . . . . 

Storage Instructions/Tips: - Battenberg will keep for 3-4 days stored at room temperature in an airtight container - Keep chocolate plastique in an airtight container at room temperature, it will keep for as long as the expiry date on the chocolate wrapper

Additional Information:
 How to make your own self raising flour: 
 1 cup Self Raising Flour = 1 cup / 115g All Purpose Flour + 1 ½ tsp Baking Powder + ¼ tsp Salt (omit salt if there is salt in the recipe) sifted together

Mary Berry's Coffee and Walnut Battenberg http://www.bbc.co.uk/food/recipes/coffee_and_walnut_88342 Rubik's Cube Battenberg http://www.instructables.com/id/Rubiks-Battenburg-Cake/ Some more fun with colours http://www.sprinklebakes.com/2011/10/batty-battenburg-cake-and-ghoulish.... 
Two coloured Nine square patterned Battenberg http://www.objetivocupcake.com/2011/05/el-16-de-junio-me-va-dar-un-ataqu... 
Egg Free Pound Cake http://www.bestallergysites.com/egg-free-cake-recipe/
Vegan Yellow Cake http://dairyfreecooking.about.com/od/cakes/r/Recipe_VeganYellowCake.htm Chocolate Plastique/Modelling Chocolate http://www.joyofbaking.com/ModelingChoc.html (For DBers who don’t have access to corn syrup, replace the corn syrup with golden or glucose syrup)
Uncooked Marzipan Recipes http://www.bbcgoodfood.com/recipes/8164/easy-vanilla-marzipan

how to make a battenberg cake
http://www.youtube.com/watch?v=B4KsFpwmKUA

Cooked Marzipan Recipes http://www.deliaonline.com/recipes/type-of-dish/party-food/accompaniment... http://thecookieshopinenglish.wordpress.com/2009/09/08/diy-marzipan/

 Disclaimer: The Daring Kitchen and its members in no way suggest we are medical professionals and therefore are NOT responsible for any error in reporting of “alternate baking/cooking”. If you have issues with digesting gluten, then it is YOUR responsibility to research the ingredient before using it. If you have allergies, it is YOUR responsibility to make sure any ingredient in a recipe will not adversely affect you. If you are lactose intolerant, it is YOUR responsibility to make sure any ingredient in a recipe will not adversely affect you. If you are vegetarian or vegan, it is YOUR responsibility to make sure any ingredient in a recipe will not adversely affect you. The responsibility is YOURS regardless of what health issue you’re dealing with. Please consult your physician with any questions before using an ingredient you are not familiar with. Thank you!


Tuesday 26 June 2012

Cuciniamo con il Parmigiano Reggiano - Le ricette sfiziose

Post in aggiornamento periodico ...ripassate a guardare le novità


Logo parmigiano reggiano_R&T
Ricette sfiziose con il Parmigiano Reggiano


risotto-con-scaglie-di-parmigiano_la_stufa_economica
 Riso con Parmigiano Reggiano blog La stufa economica (Marika)


  coniglio-con forma_la_stufa_economica_marika-pronto-002
Coniglio con "forma"   blog  La stufa economica (Marika)


  crema di parmigiano_lilisa_CI


parmisan basket from 64 weeks 64 food rules


Passatelli


da Menu Turistico grazie Ale e Dani :)) link in fase di inserimento

sablè cumino limone 
  Sablè al Parmigiano  di Menu Turistico


DSCF7056
gelato al parmigiano di Ale


piatto verdure
Terrina di verdure e formaggi di Menu Turistico


Pasta Bianca con Chips di Parmigiano Reggiano


insalata-riso-corallo-e-parmigiano1
Insalata di riso Corallo al Parmigiano Reggiano e alle verdure primaverili di La Belle Auberge


biscotti-salati2 belle auberge
Biscotti salati al Parmigiano Reggiano di La Belle Auberge


insalata-finocchi-rucola_belle auberge
Insalata di finocchi e rucola con chips di parmigiano di La Belle Auberge


crostini-prosciutto-grana-01_belle auberge
Crostini alla moda di Luigi di La Belle Auberge


ziti con involtini alla genovese_belle auberge
Ziti con involtini alla genovese di La Belle Auberge


insalata-fave-finocchi_la belle auberge
Insalata di finocchi e fave di La Belle Auberge


I prossimi inserimenti saranno le ricette degli amici di La Cucina Italiana


Pasta integrale con crema al parmigiano di Zibaldone Culinario


Pallotte cace e ove di Sex and the kitchen


Caesar Salad di Arricciaspiccia


Lasagnetta verticale di zucchine in fiore e crema al Parmigiano Reggiano di La Belle Auberge


taralli al parmigiano 
Taralli al parmigiano di Burro e zucchero


 caviale di zucchine
Caviale di zucchine e crema al parmigiano di Meditandum


crepe di grano saraceno con verdure
Crepe di grano saraceno con verdure di Ilaria's kitchen


bavette con pesto alle nocciole 
Bavette con pesto alle nocciole di A tutta cucina


zucchine ripiene al parmigiano 
Zucchine ripiene al parmigiano di A tutta cucina


Insalata in technicolor nei cestini di Parmigiano
Insalata in technicolor nei cestini di Parmigiano di The Dreaming Seed


Soda bread con carote e Parmigiano di Sweet & Sour


Rombi Al Parmigiano Reggiano di A tutta cucina


Polpette in agrodolce di In Cucina con Fantasia


Panini al parmigiano di L'incapace in cucina


Lollypops di parmigiano di La stufa economica e di Arabafelice


Minicupcakes salati al parmigiano e speck di Terra e farina


Frollini di parmigiano di L'angolo goloso di Evelyn


Post in aggiornamento periodico ...ripassate a guardare le novità